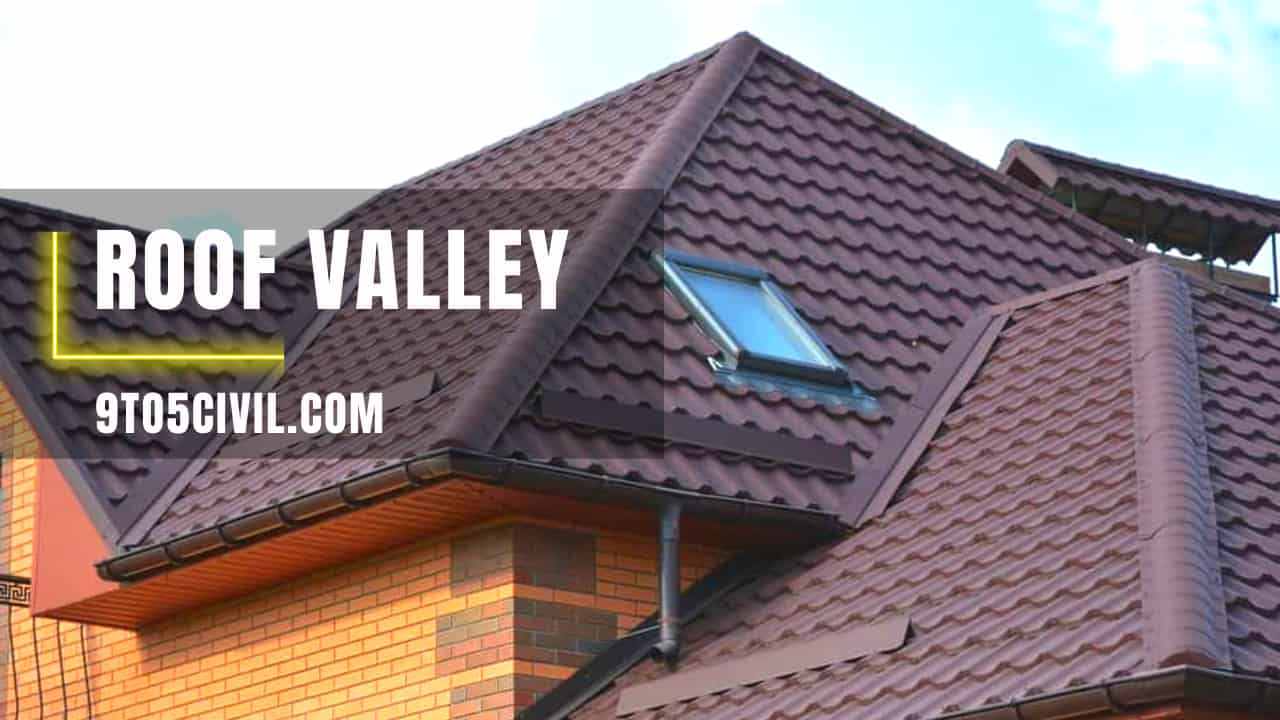
Introduction of Roof Valley
A roof valley is necessary for any household that wants its house to protect from damage. It doesn’t allow the water to accumulate on the roof. It also gives an aesthetic look to the house.
So people prefer roof valley for protection of their house from the weather condition. Moisture can easily damage your house if you don’t take care of it. It’s necessary to check the condition of your house from time to time. It saves you from grave damages that occur in your house.
If you are looking for roof valley information, you are in the right place. Everything you need to know about roof valley is included in this article. So information on Roof Valleys is given below.
What Is Roof Valley?
A roof valley is a juncture between the slope of a roof. It protects the roof from moisture and weather conditions. It changes the angle and direction of the slope of the roof a little bit so debris won’t accumulate on top of it.
It helps the water to run off easily through the slope of the roof. It doesn’t allow debris like is ice leaves and snow to accumulate on the roof lining. Which in turn doesn’t block the water runoff on the roof.
A roof valley is named like that because after installing the roof, it looks like a valley. The shaped valley looks like the natural valley of any green place. It not only gives protection from moisture and weather conditions. But it also gives the aesthetic look to the house.
It is preferred by many house owners as it protects their home sweet home from the damages the weather cause. And the cherry on the top is the aesthetic look it gives. People want their houses to look beautiful. So what’s better than a roof valley which not only protects the roof but also looks good.
Types of Roof Valleys
Roof Valley is mainly categorized into three different types Open Roof Valley, Closed Roof Valley, and Woven Roof Valley. Three types of roof valleys are listed below:
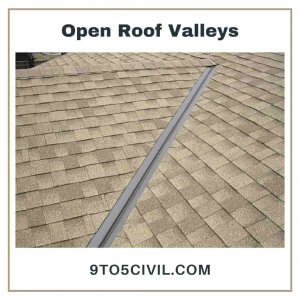
1. Open Roof Valleys
Open roof valleys are made of metals. In this type of roof valley after placing the underlayment to the roof, an additional layer is added. A metal piece is installed on top of the underlayment. The metal surface fully protects the underlayment from moisture intrusion. It is fit like this so the water can not enter into the lining of the roof slope.
Before cutting out the valley area open valley shingle installation leaving the metal part showing. The open surface gives the decent look to the roof. Which is preferred by many house owners.
It is lightweight which saves the roof from excessive pressure from its weight. It is durable and can last for a long time. So it gave less trouble for a long time and saves your valuable time.
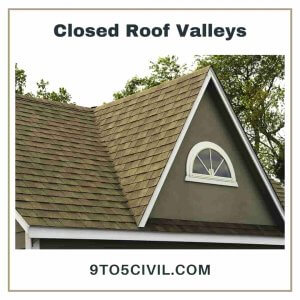
2. Closed Roof Valleys
In this type of Roof valleys, the ice and waterproof underlayment is installed first. It protects from any moisture intrusion to the roof. Closed Valley Roof Installation, overlapping each other where the slopes of the roof meet. It completely sealed the valley junction and it covers the underlayment properly. Here shingles act as both wear surface and valley lining.
It gives the aesthetic look that most people want for their house. The exterior of the house looks elegant just by installing these. Which also protects the roof from weather conditions and moisture.
It comes cheaper as compared to open roof valley. Because it doesn’t include the metal part. So, people who want budget-friendly valleys, prefer this type. And they get the beautiful aesthetics it provides with its low cost. So for most people, it’s a win-win deal.
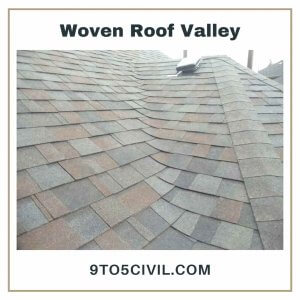
3. Woven Roof Valley
It is a type of closed roof valley. In this type of roof valley shingles from both sides of the roof run adjacent slopes, changing the direction of the slope. It prevents the water runoff from getting inside the shingles.
Installation of shingles on the slope of both sides and the meeting of two roof sections protects the underlayment from moisture. But it is not installed on roofs that have a pitch less than 4:12.
It is budget-friendly so preferred by people, who are looking of low price roof valley system. And it gives the decent look to the house. The shingles add more beauty to the structure of the roof. Which is a basic preference of any house owner who wants an aesthetic look to their house.
Also Read: Best Gutter Sealants
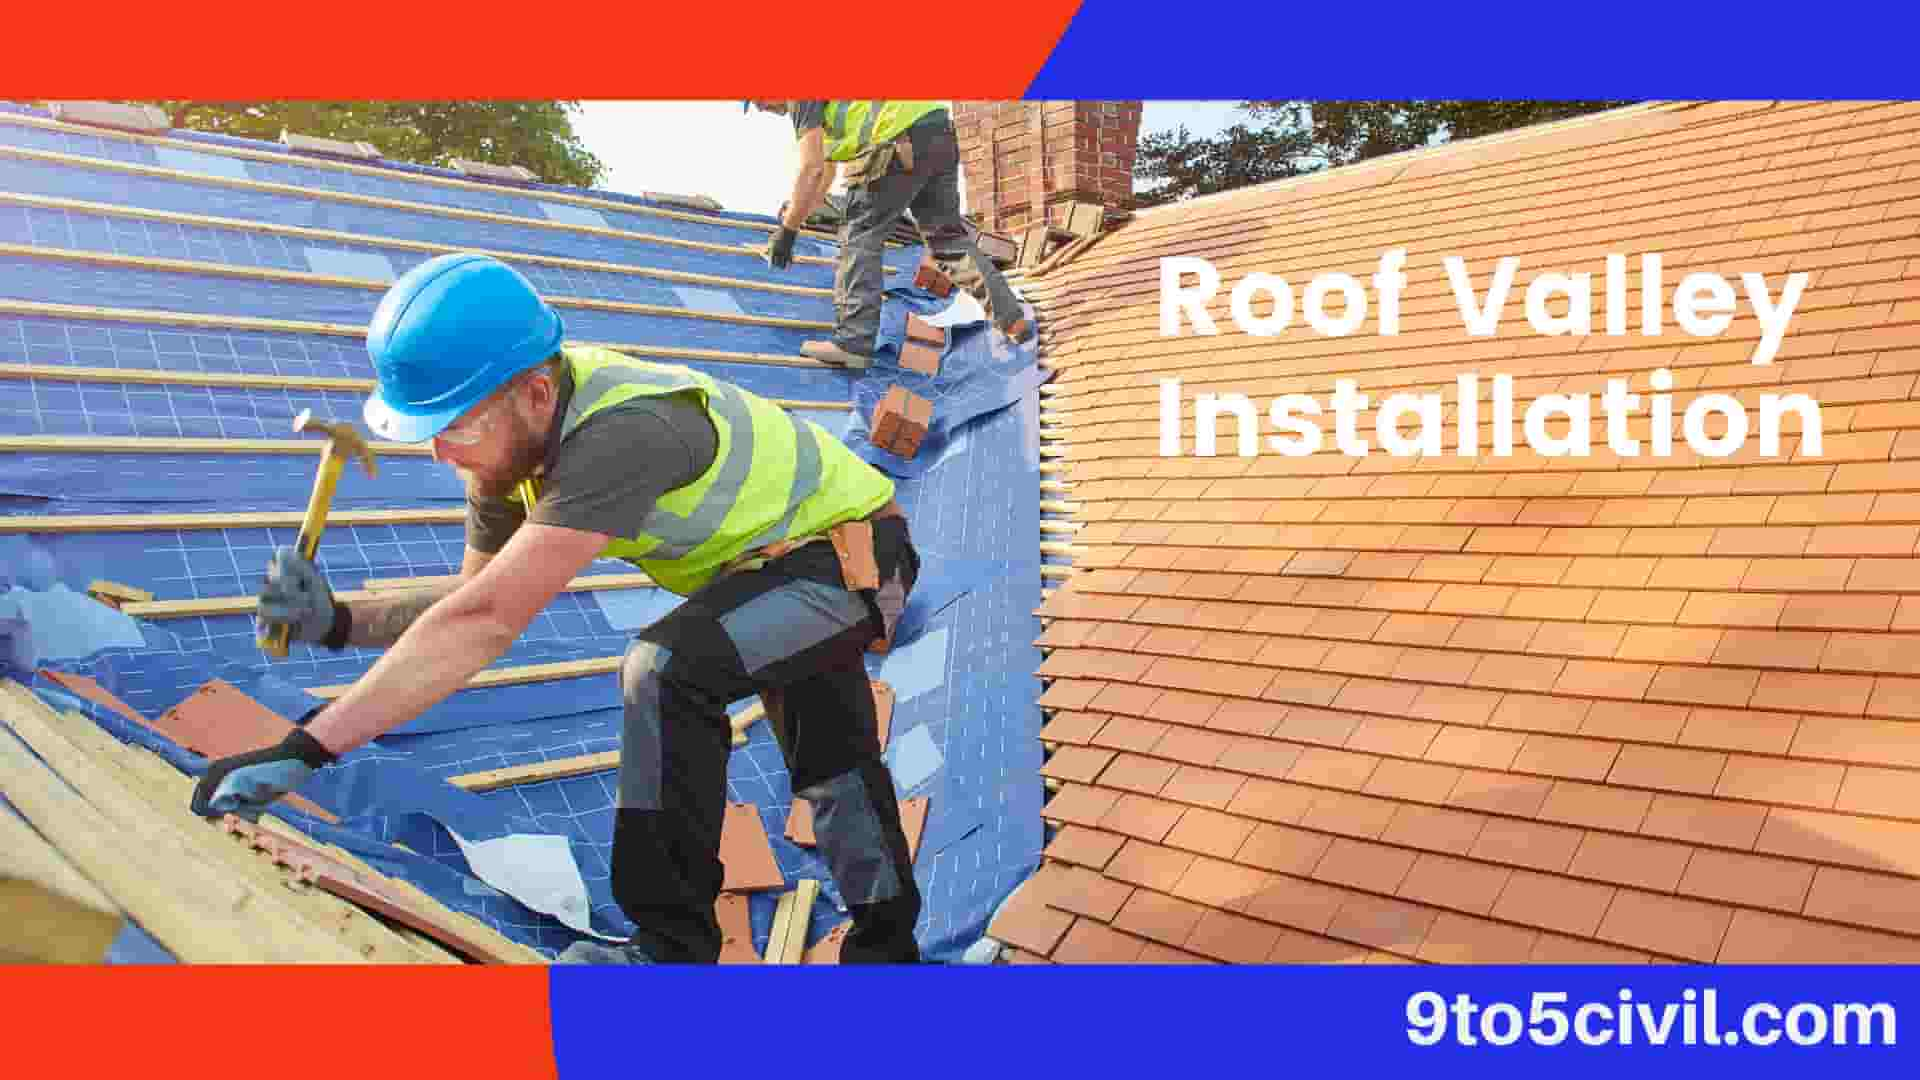
Roof Valley Installation:
The installation process of Roof valley consists of various steps which are as follows:
1. Place Shingles:
After placing the underlayment and flashing. You have to place shingles on one side of the flashing and do not hammer nails. Then you have to put shingles on the other side of the valley and there also you don’t have to hammer out the nails. You just have to place the shingles properly on both sides and overlap them.
2. Choose a Method to Cut the Shingles:
Now you have to decide which method of cutting of shingles you will have for the valley. Different cuts are used for different types of roof valleys.
Like you can cut the shingles to the parallel of the centerline or you can leave like 3 inches in the top of the valley then leave like 1/8 inches with each foot you go downward. It’s better to ask the roofing staff which type will be best for the roofing of your house. Then mark a line with chalk to know where to cut.
3. Cut Shingles:
Before cutting shingles you should place a metal sheet under it so the underlayment won’t get affected. Then you have to cut the shingle along the chalk line you have drawn.
4. Cutoff Shingles:
Cut the corners of adjacent shingles. It will protect the roof from any water penetration to the underlayment. Lifting the shingles cut all the pointed edges so there won’t be any corners left for water intrusion.
5. Apply Caulk:
Apply caulk underneath the shingles by lifting them. Then apply it again near the edge of the shingle. It has to apply twice for effectiveness.
6. Apply Roofing Cement:
Lifting the shingle and applying the roofing cement properly. It adheres to the shingle to the underlayment. It sealed the shingles and prevent the slope from water intrusion. It has to be done properly as nails are not used. It is the only thing that is used for the adhesive property.
7. Lay Shingles and Mark Line with Chalk:
You have to lay shingles single or double tabs on both sides of the valley. From the centre there should be a 6-inch space where nailing is should not be done. On the top later of the shingle mark 2-3 inches past the valley centre by chalk.
8. Cut Shingles:
Cut the top layer of the Shingle properly by a hook blade along the chalk line. Put a piece of metal in the shingle to protect the lower layer.
9. Cut Corners and Apply Roofing Cement:
You have to cut the corner of the shingles. Then you have to apply a bead of roofing cement between upper part shingles and lower part shingles. So they can attach properly with each other. You also have to apply the roofing cement between the adjacent shingles and place them correctly.
10. Weave Shingles:
All the shingles used must be full-sized without a cut. Then you have to overlap them to the other side of the valley. It is necessary to shingle both sides at the same time. You have to do a course of placing shingle on one side then you have to do that to another side.
11. Repeat the Course:
You have to continue placing the shingle on one side and then doing the same to another side. It has to be done simultaneously. Then weave the shingles of the alternate side properly. Do not place nails within 6 inches of the valley centre.
12. Shingles Overlap on the Valley Centre:
You have to overlap the shingles of the alternate side properly. Full-size shingles must be used. The lapping of the valley should be at least 8 inches. You need to use single or double tabbed shingles. Then cut and attach them with the overlapping shingles. You have to check if all the shingles are placed properly.
Also Read: What Is Metal Roof Insulation? | Metal Roof Insulation Options
Repairing Roof Valleys
Roof valley protects your house from moisture intrusion. It is one of the essential things to take care of your house. The repairing must be done when there are problems like water leaking, felt and deck damage sagging, missing shingles, and the water damaging and mould damage problem.
So you have to check the roof from time to time to check the damage. Replacement is necessary if the water is leaking. Then you should call the roofing staff for replacement.
Cost Of Repairing Roof Valley:
The cost of repairing may vary according to the area of damage. The cost of repairing at different conditions is listed below:
For Minor Damage, It Cost $150-$300:
This includes repairing minor leaks or flashing, replacing missing shingles, small caulking and sealing, and vent boot repairing.
For Moderate Damage, It Cost $400-$1000:
This includes replacing shingles in 10’×10’ area, flashing and valley replace, fixing leaks with minor water damage, and, felt or decking repair.
For Extensive Damage, It Cost $1000-$3000:
This includes replacing many 10’×10’ areas, major leaks with structural repair and water damage, major flashing replacement, and sagging roof.
Cost of Removing A Roof Valley:
The cost of removing a roof valley starts from cost $350. The cost of removing a roof valley depends on the area of the roof valley. It also depends on the different types of roof valleys installed in your home.
Advantages Of Roof Valley:
The various advantages of roof valets are as follows:
Advantages of Open Roof Valley:
1. Improve drainage system:
It allows the water to run easily of the roof. It prevents water infiltration in the slope of the roof. It doesn’t accumulate the debris and the leaves. And it doesn’t trap water.
2. Longevity:
Metals are used in this type of roof valley. Metals last long and protect the roof. It doesn’t wear off easily compared to the shingles.
3. Variety:
Different types of metal can be used in this type of roof valley. Aluminium, stainless steel, galvanized steel, and copper are commonly used which gave the customization choice to the buyer. And with time it looks even more beautiful.
4. Easy to Install:
Installation of these types of roof valleys is easy. It doesn’t require many skills to install these. It doesn’t take much time.
Advantages of Closed Roof Valley:
There are various advantages of Closed roof valley which are as follows:
- It protects the slope from moisture and weather conditions.
- Additionally, it gives the valley an anaesthetic look. Its design is normal but it looks classy from the outside. Most of the buyers prefer it for its phenomenal look and its protection technique of the roof.
- It is cheaper in comparison to open roof valley. So people who look for low-cost roof valleys prefer this type. It doesn’t include the metal things so it comes at a cheap rate. Metals are expensive.
Disadvantages Of Roof Valley.
Also Read: Why Is My Gutter Leaking? | How to Fix a Leaking Gutter Joint?
Disadvantages of Roof Valley:
There are also some disadvantages of roof valley which are as follows:
Disadvantages of Open Roof Valley:
The disadvantages of an open roof valley are as follows:
- It costs more as compared to the closed valley. Metals used in this type of roof valley make it expensive.
- It does not give the aesthetic look like the closed roof valley. So many people prefer a closed roof valley.
Disadvantages of Closed Roof Valley:
The disadvantages of a closed roof valley are as follows:
- The construction doesn’t hold up like an open roof valley.
- Shingles wear off easily much faster than other parts of the roof.
- After some time closed valley becomes the weakest part of the roof.
Conclusion:
A roof valley is used to protect the roof from moisture and weather conditions. If you want to protect your house from damages, it is one of the essential systems you should install in your house.
Hope this article helps you with what you were looking for like what type of roof valley to choose, what is the cost and advantages and disadvantages of the roof valley. All the details above tell about all the things you have to know about roof valleys.
What Is the Valley on a Roof?
A roof valley is necessary for any household that wants its house to protect from damage. It doesn’t allow the water to accumulate on the roof. It also gives the aesthetic look to the house.
Metal Roof Valley
Open metal roof valleys perform especially well to avoid snowfall and debris formation. Because there is no need to nail more in this type of valley.
Valley Flashing Installation
Install a centred underlayment in the roof valley. Then a 24 ″ width non-corrosive metal valley flashing is installed. Sequential sheets of flashing metal of at least 12-inch laps should be coated.
What Is a Dead Valley on a Roof?
A dead valley roof is a point on a roof where two slopes meet in such a way that it is difficult for water to flow. In this type of valley, water flows in a flat area but does not flow out. Commonly referred to as “Dead Valley”.
Metal Roof Valley Installation
Valley flashing installation for a metal roof is as follows:
- The first step is to install a metal roof flashing panel at the bottom of the valley. After that, fix by screw at a distance of about one inch from the edges of the panel.
- Place the next flashing panel towards the ceiling strip, overlapping four inches above the first panel. And place a screw in the bottom corner of each panel.
- Repeat the first three steps on the valley flashing panels at the top of the roof.
What Is the Best Roof Valley?
The valley of closed roofs is considered to be the most aesthetically pleasing. Homeowners generally prefer the seamless look of a closed roof valley to a metal-lined open valley.
What Is a Flat Valley on a Roof?
Dead Valley roofs are generally of two types. The dead in the first valley ends at the corner of a flat wall instead of flowing directly from the roof. In the second type, those two or more opposite slopes end in each other.
Is Roof Valley Flashing Necessary?
The extra level of flashing in the valley helps prevent water intrusion. Metal flashing helps move water from the roof faster.
What Is a Valley on a House?
Roof “valleys” are usually areas on the roof where V-shaped slopes meet. Which helps the water to flow easily.
What Is the Purpose of a Valley Gutter?
Valley gutters have a different function than rain gutters. But the purpose of the Roof Valley is to allow rainwater to flow from the roof.
Do Roofers Replace Flashing?
Responsible roofing companies do not reuse decaying materials when laying new roofs on older buildings. These companies replace any rusty flashing.
Like this post? Share it with your friends!
Suggested Read –
- French Casement Window | What Is French Casement Window? | Advantages & Disadvantagesof French Casement Windows
- What Is Composite Roofing? | Types of Composition Roofing | Composition Roof Cost
- What Is TPO Roofing? | TPO Roofing Installation & Cost | TPO Roof Repair
- Crawl Space Foundation | What Is Crawl Space Foundation? | How to Build a Crawl Space Foundation?
- Augmented Reality in Construction | Augmented Reality in Civil Engineering | Augmented Reality for Construction Projects
 Skip to content
